
Michelle Marvig Explains the Quick Point Ruler
Driven by Michelle Marvig
Quilts, clothes, bags, cushions, tea towels and any number of other items could be candidates for a Quick Point Ruler embellishment. Two styles of rulers are available — Prairie Point and Scallop, in a variety of sizes. The concept behind them is to make lengths of fabric into shaped edging, faster and easier.
The original ruler design for the Quick Point company was the Prairie Point Ruler, which is available in three sizes: 1in, 1!/2in, 2in. The traditional way to make a Prairie Point is to cut an individual square, fold in half, and half again to form a triangle. These individuals then need to be placed along the edge of the quilt, or project, and evenly spaced, before stitching.
The Prairie Point Ruler takes away a lot of the work. Strips are cut at the width of the ruler being used, which is four times the finished height of the Prairie Point. The ruler is placed on top of the strip, and cuts are then made in the slots along the length of the ruler. Continuous lengths are made by joining strips with a 45 degree before you start cutting, and simply moving the ruler down the length, aligning the last cut from the previous placement with the first slot in the ruler, to keep the cuts even.
The ruler is a softer acrylic than the straight-edge rulers that we use. The slots have a teardrop in the end to allow your blade to cut right up the end of the slot. I did find that a 28mm rotary cutter worked better in the slots, as it could cut further due to the shape of the blade. Mathematically, the ruler size as stated is the finished height of the Prairie Point. Therefore, the base is twice the height: 1in Prairie Point has a 2in base length, 1/2in Prairie Point has a 3in base and the 2in Prairie Point a 4in base.
Learn how to use appliqué and embroidery stitches!
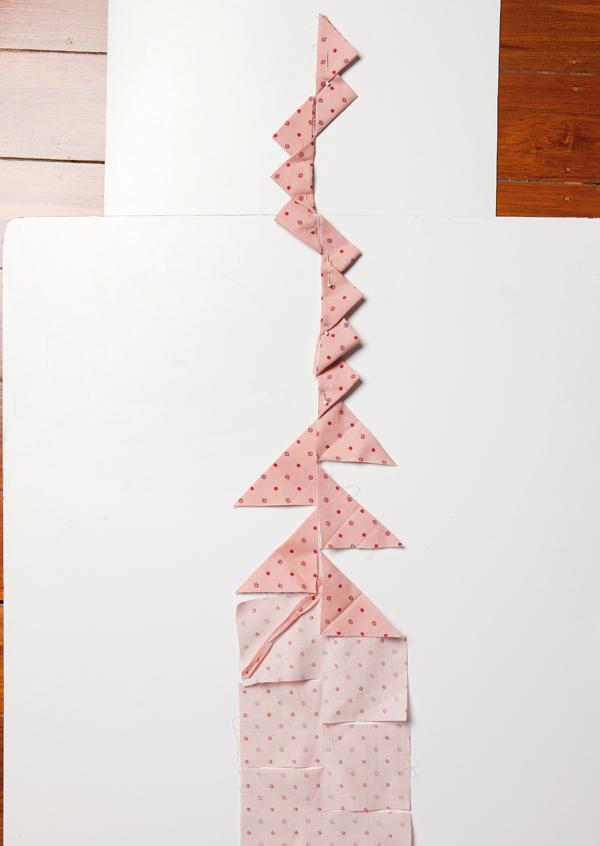
Once all the fabric is cut, it is taken to the ironing board. Placed on the board, all the squares are folded in half along one diagonal, in the same direction. It’s suggested that spray starch should be used to keep the folds in the fabric. A second diagonal halfway fold creates the triangles.
At this point you have folded triangles above and below the middle of your fabric strip. The strip is then folded in half to create the finished edge. However, you have two options at this stage, either to simply fold up and leave one triangle behind the other triangle, or to overlap the triangles, by placing the end of each triangle inside the adjacent triangle.
Join English paper piecing expert, Sue Daley, as she shows you English paper piecing!
Once the design has been chosen, place a little appliqué glue on the loose, lower point of each triangle to hold it in place. This is much easier than millions of pins in a long run of Prairie Points. A third option is to fold the squares in half horizontally first, then fold the two top corners down to the mid-point on the bottom to create the Prairie Point with a centre fold.
For even more impact, join two contrasting colour strips to make the width required. For a 1/2in Prairie Point, two 3/4in strips are required. The middle seam is pressed open and the centre line of the ruler placed on the seam, cutting as before.
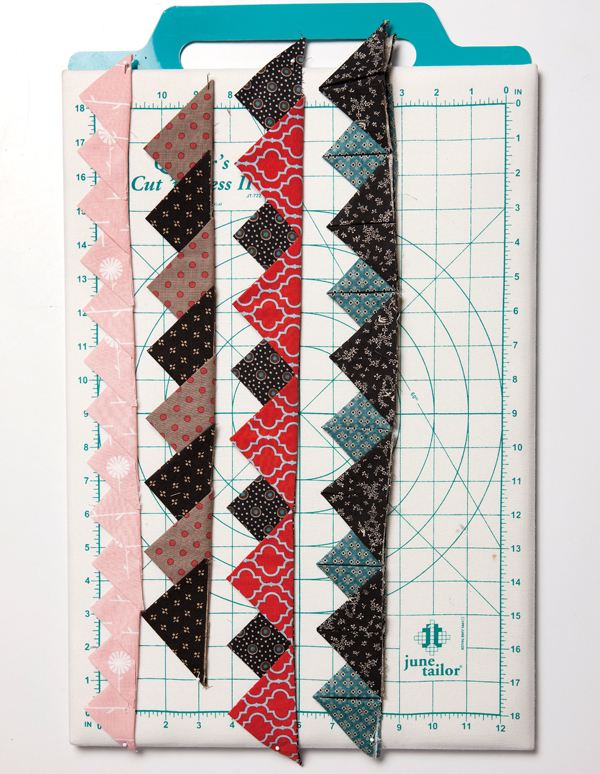
The Prairie Points make fun embellishments. They can be sewn in rows to make a full, textured cushion, or cushion trim as I have done (see Photo 2).
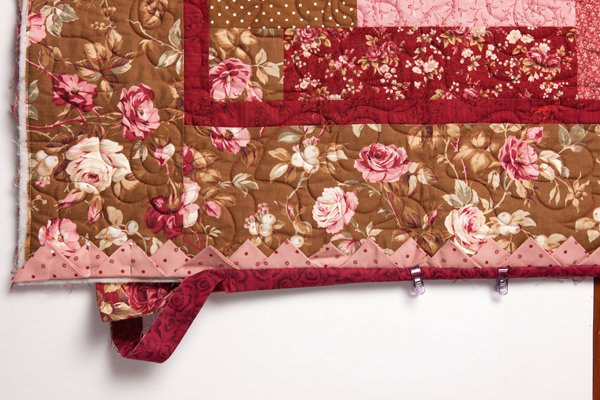
This type of application could be used on garments, bags, placemats or even inserted into seams on quilts. They can also be placed around the edge of a quilt and encased in the binding seam to make an attractive, textured flange (see Photo 3). Two options for using them around the edge of a quilt. If the final edge of the outer border is not quilted, you can place the Prairie Points along the border and stitch with a 1/4in seam.
This can then be folded back to give the finished edge on the front. The batting would need to be cut to the same size as the border, then the backing folded over to meet the seamline on the Prairie Points and hand-stitched. Or you could use a bias strip to attach the Prairie Points to the edge of the quilt, rolling it to the back to leave the triangles extended past the edge of the quilt.

Ma Bunny Pincushion is a sweet little project and the perfect sewing accessory!
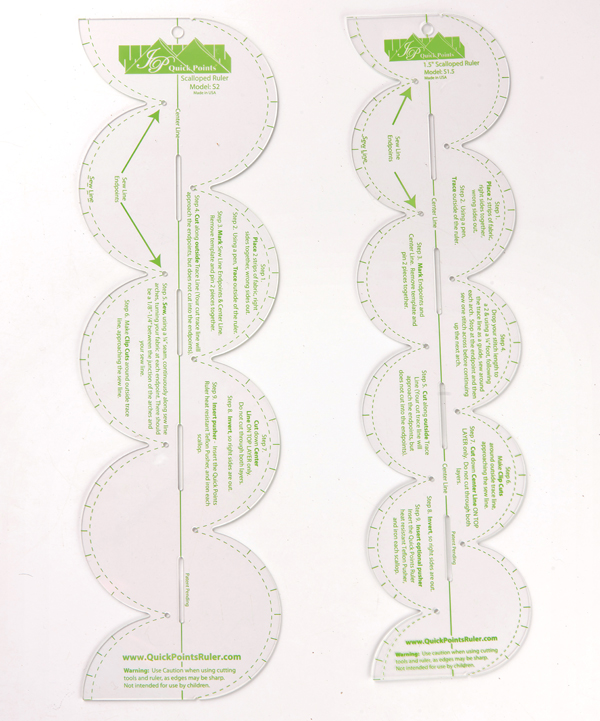
The second type of ruler from the Quick Points Ruler Company is a Scallop Ruler. Also available in three sizes — 1in, 1/2in and 2in — this ruler works on a similar principle, that is, you will make a two-sided scalloped-edge strip that will be folded in half for use in the same manner as the Prairie Points. To create scallops, two strips are placed right sides together. The Scallop Ruler is then placed on top of the fabric that will be the inside of the scallops.
You then draw around the curved edge, moving down the strip, also using the holes in the ruler to mark the end of each curve. Down the middle of the ruler is the centre line, which also needs to be marked, as it is the cutting line once the stitching is complete. To stitch, use your ¼in foot, drop your stitch length and sew ¼in inside the drawn line, making one stitch across at the dots marked at the turning of the curve.
This is important, as it gives space on the point when the scallops are turned through. The excess fabric is trimmed and points are clipped into, before pulling the two layers apart and cutting the single layer along the centre line. The scallops are then turned through and pressed.
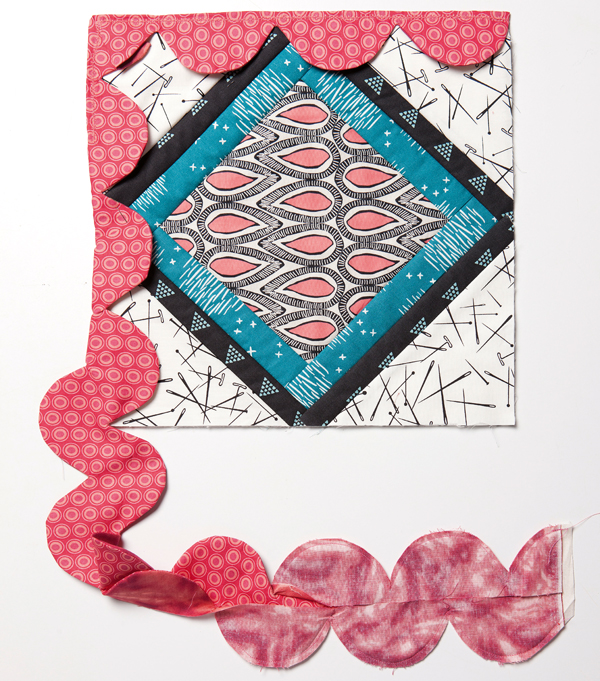
Teflon Scallop Pushers are available and would make this job quicker, as they are simply inserted into each scallop to give the shape and left inside the scallop while being pressed. Scallops can be used in the same manner as the Prairie Points, but also have enough depth in the middle, between the ends of the curves, to be used as a funky binding on a quilt (see Photo 4). I did consider topstitching the scallops, however the front and back do not align so this is not an option.
Both the Quick Points Prairie Point and Scallop Rulers were fun to play with and would add wonderful texture to a project. Full instructions come with the rulers, however many tutorials using the rulers can be found on the internet.
These rulers are sold in Australia by Annie’s Designs. They can be found at www.anniesdesigns.com.au.

