Setting up your sewing workspace with Anita Ellis
We have all coveted the beautiful places that people create for their sewing adventures. I can swoon over these just as much as the next quilter. But we all know this is not necessarily realistic.
For one, we all create differently. I am a messy thing whose focus remains totally on the task in hand, with no regard for my surroundings. Sometimes when I finish a quilting project I look behind me and cannot recognise the place as I have thrown threads and fabric to the wind while working. I would love to be a tidy person, but a leopard doesn’t change its spots. About the only time my studio is tidy is when I clean up to teach a class and need to fit extra people into the space I usually have just for myself. I am such a spreader!
You may be a very tidy person who can only work with order around you. That is great, but sometimes the best way to set up your space for quilting success isn’t necessarily the prettiest. The view out of the window may be wonderful, but if you can’t position your desks so that quilts do not fall off while you are working, then it isn’t going to work.
On the subject of being tidy, it does really help if you keep your work table free from clutter that can catch and drag your quilts as you work on them. Even I manage to do that! You may be lucky and have a huge dedicated studio, or maybe your creative space is just the corner of the dining table that the family allows you to have for yourself.
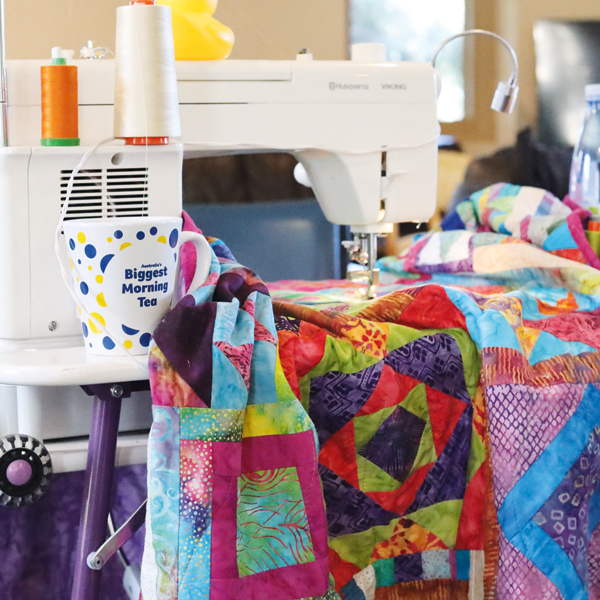
When setting up your space, you need to consider the final goal: finished quilts. We need an area that allows the quilt sandwich to flow as smoothly as possible, with the least amount of drag. There are several factors that play a part in reducing the drag on the quilt and I will look at each in turn.

Table height
The height of your work table is critical. Our best work will never be done if we are uncomfortable and our arms are hanging in mid-air unsupported. The ideal table height to work on for most people is the normal dining table height of around 28in to 30in. If you then set your sewing machine on top with the extension table attached, the height has been raised by several inches, leaving you in an awkward position.
There are some lovely cabinets and tables that allow you to drop your machine down to the level of the table and fill in the space around with custom inserts that leave your sewing machine at the right height. If you have room for these, that is great. Some of them are also portable, but more on that later.
But what if that isn’t an option for you? One way you can create the right height for your table is to literally cut a hole for your sewing machine towards the right corner and add a supportive shelf underneath at just the right height. Maybe not ideal for your best dining table, but a good IKEA hack could serve the purpose. By creating this you will have the machine at the right height and space for the quilt to flow to the left.
Another good option is to look for kids’ desks that are lower than the normal table height so that when you position your sewing machine and extension table on top, they reach a more comfortable height for sewing. Many adjustable tables only go higher, not lower, than the regular height, and that won’t help in this situation. Just be sure your knees fit underneath.
How to arrange your quilting tables
As we have discussed, it is all about reducing quilt drag. If we can stop the quilt from dragging, we are on the way to successful quilting. Now that your machine is housed in your lovely custom-designed table (bought or created), set at the right height for you, you need to set up the space so the quilt cannot fall off the table and drag the stitches with it.
Building your workstation into a corner is ideal as you will have the wall or window behind it to provide support for the weight of the quilt. This way, when the quilt is moving around, it cannot fall onto the floor. Extra tables next to your workstation can also be helpful. You need the most space to the left of the machine for the quilt to flow. If you are using other tables, trestles or ironing boards for this, they need to be at the normal table height so that they are level with the sewing machine.
If you’re the ‘corner of a dining table’ person, you could have your sewing machine set on its own table at the same height as the adjacent dining table and butt the two tables together. This will increase the free-flowing space for your quilt a lot. Your sewing machine table might be a portable one that folds up out of the way at dinner time and can also travel with you to workshops.
Sometimes quilting can be the most fun when you are connecting to family in a shared space, rather than locked away in your own room. But what about when you go to classes and workshops? It is not always possible to have the best set-up everywhere, however there are ways you can improve your workspace ergonomics no matter where you are.

Setting up comfortably in class spaces
I have mentioned portable tables that set your machine at the right height and these are great to take to class if you have them. You can often butt your table up to your allocated space in the classroom so that you are working at the easiest height and have extra space for your quilt to flow. However, this isn’t always possible. You may be stuck with your machine and its extension table set on top of a regular-height classroom table.
This is going to get uncomfortable very quickly and the drag on your quilt when it catches on the edges of the extension table is going to be annoying. You can usually stack a couple of chairs on each other to give you a more ergonomic work height. This will raise you up a couple of inches, which can really help. Make sure you feel stable though. To help with the drag, position an additional extension table or some books next to you to extend the level workspace. Use anything that stops the quilt drooping over the edge of the table and getting caught. And try to keep tidy — it really helps if your workstation isn’t cluttered with all your quilting paraphernalia.
Chair height
A quick note on chair height. An adjustable chair is very useful for fine-tuning your quilting space. And another tip: if you are a little short on stature and you need to raise your seat so high that you cannot reach the sewing machine pedal, put the pedal on a box. Problem solved. If I am going to a retreat or class and it is at all possible, I take my own chair so that I can make ergonomic adjustments to suit me. This results in many happy hours of quilting.
So there you have it, my thoughts on setting up a quilting space in a not-so-perfect world that will have you well on your way to creating beautiful quilts as easily as possible. And hey, if you have the view, enjoy it — you just might not get as much done as you plan if you are staring out of the window!
Next time I will be sharing my knowledge as a longarm quilter of many years and discussing whether you need a longarm or midarm quilting machine to do great quilting. If you are thinking about this you will really enjoy reading about the pros and cons and how to choose the right longarm machine for you.
Happy quilting!
Anita Ellis

