Road Test: Maree St Clair Acrylic Templates
Driven by Michelle Marvig
Early in my foray into the world of patchwork, I encountered the ‘template’. We had rotary cut a schoolhouse base and made our own templates for the shapes required to build the roof. This was not a happy building process. I traced shapes onto template plastic, cut them out, and used these shapes to draw around on my chosen fabrics, which I then cut with scissors. After sewing these shapes together to make the roof, I was bitterly disappointed when I went to piece the body of the house to the roof … the roof was way bigger than the base of the house. This experience made me wary of template shapes for years.
Luckily, we now have talented quilt makers producing accurate acrylic templates for use with our patchwork blocks. Maree St Clair has designed her template range to be user-friendly, in a wide variety of designs for all piecing techniques.
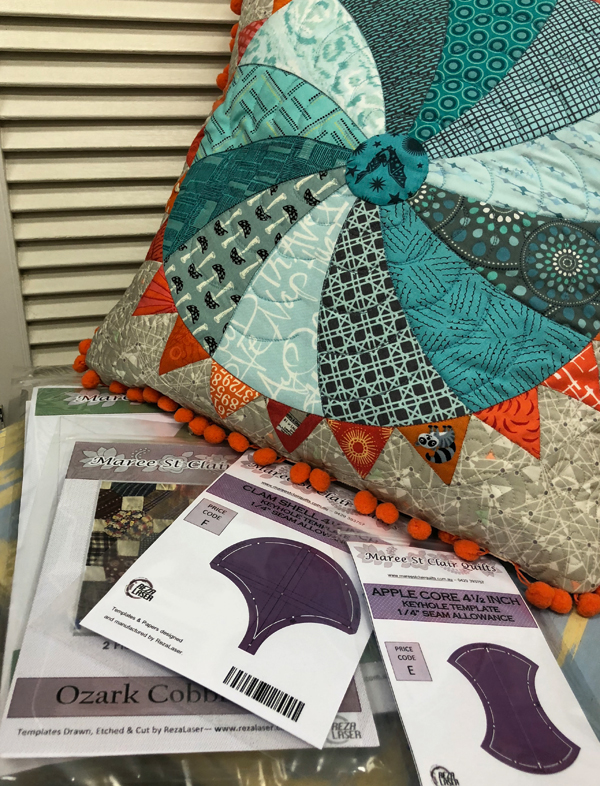
Maree is a woman of many talents, piecing her quilts both by hand and machine. Her templates are very user-friendly, no matter which style of piecing you prefer. For the Road Test I started with the Floral Wheel block, as this was a design I had always loved but never attempted due to the curves in the centre. The template set that I used has four main shapes, cut from 1/8in acrylic with small ‘keyhole’ openings along the 1/4in seamline. Interspersed between these are small open spots for marking the seamline, and also for reference when lining up the different shapes.
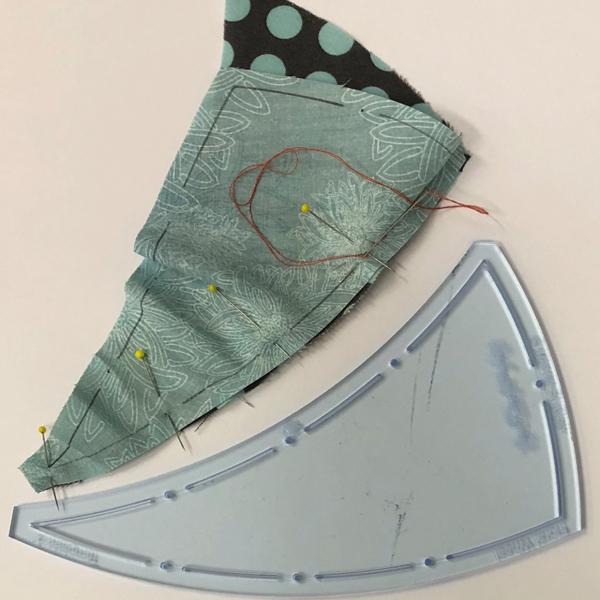
While the template set came with a quilt pattern, I chose to make a cushion only, using my stash. I cut each individual curved, centre aqua shape easily using the template (but this is a directional piece, so make sure your pieces are cut in one direction — the pattern does state this). I did the same for the orange outer points. I was able to layer fabric to cut the background beige pieces. After cutting, I marked the seam allowance and reference points using a fine mechanical pencil – a normal pencil is too fat to fit in the openings. And the larger the opening, the more room for error when marking the seamline. A variety of mechanical pencils can be used, using a lead size of 0.7mm. At office supply stores you can find mechanical pencils with a variety of lead colours to suit any colour fabric. Once I had cut and marked everything, I was ready to sew.
Confession: I hand pieced some centre sections and machine pieced the others. To hand piece the curved inner shapes, first I pinned along the seamline easing in the curve. To hand piece, the small running stitches need to proceed along the drawn line on both shapes. It is easy to check and manipulate if required when working by hand.
Working by machine caused a little issue with bulk on the inner point. Had I fully worked the centre by hand I could have eliminated the bulk at the centre. But the centre section did sit perfectly flat after it was pieced. I opted to machine piece the outer points. The pattern said to press each seam open. I did do this and it sat very well when it was pieced. However, as a machine quilter, I did lose my ditch for quilting. This is an issue in general when pressing seams open if you are planning on machine quilting in the ditch. The outer, pieced curve fitted beautifully onto the inner section. The four pieces of the background were simply pieced. The reference marks along the inner curved edge of the background made it simple to line up the pieced points of the outer ring and keep the correct amount of fullness of the background between the points. This meant that when pieced, the block was flat, even after all those curved seams. It was a joy to piece.

The same principle applies to all of Maree’s template sets. The Apple Core has lots of curved edges, but has reference dots along the edges to line up the concave and convex curves. The smaller shapes have only one dot, while the largest size has three dots on each side. For hand piecing, you only need to pin and sew from one dot to the next. It makes it easier to hold and keep the drawn seamlines matching. Clam Shells work on the same principle, as do many of the other blocks on offer — Floral Crown, Cindy’s Wheel, Daisy Mae and Snowball Delight to name a few. However, when working with straight-edge shapes, Maree has taken off the ‘dog ears’ on many shapes. This means that when lining up two shapes to stitch, the cut ends of the shapes align, taking away the guesswork for where to place the two pieces.
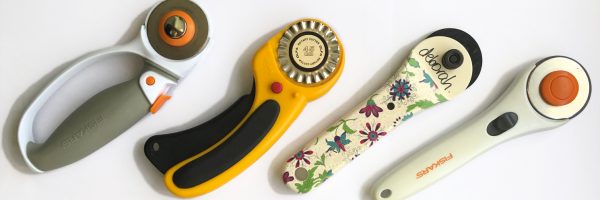
Maree sells her template sets in a variety of styles. I have played with the ‘keyhole’ style of templates. ‘I SPY’ templates are 1/4in-wide acrylic shapes for the different sets. You can draw your entire seam allowance by running the pencil on the inside of the templates, and the cutting line by tracing around the outer edge. Cutting is best completed with scissors, as there is not much to hold with a rotary cutter. Solid templates have no keyhole openings but have an etched seam line, and have a seam allowance. These give you more to hold on to.
Maree produces her templates under the business name of Reza Templates. They also make paper pieces for English paper piecing, as well as custom shapes for order in any style. If only I had started working with accurate templates from the beginning!
You can find Maree’s templates at www.mareestclairquilts.com.au or www.rezalaser.com.au